Start a new family tradition by filling a decorated jar full of thanks. Expressing gratitude is (or should be) a year-round activity!
Using a thankful jar at Thanksgiving? Give each guest one or more paper slips or paper leaves, and have them write what they are grateful for, read it aloud and add it to the jar. Make one for each guest or family as a place marker and party favor, or simply make one big beautiful one for a tabletop centerpiece.
Supplies:
Clean, empty jar
Scraps of colored/craft paper
Real leaves or leaf pattern/stencil
Alphabet stickers
Scraps of ribbon, twine or raffia
Double-sided tape or glue stick
Pencil
Scissors
Buttons, tags and other embellishments (optional)
Here's How:
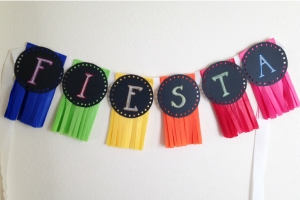
1. Start by cutting a label, tag or flags for the jar from pretty paper.
2. Use alphabet stickers to adhere a name or phrase to the piece of paper. (Beside stickers, you can create the wording with rubber stamps or magazine clippings, or simply write it with colorful markers.)
3. Adhere the label to the jar or tie it on with twine or ribbon.
4. Decorate the jar with buttons or other embellishments if desired.
5. Use a pencil to trace around real leaves or leaf stencils onto colored paper.
6. Use scissors to cut out all the leaves. (You can also use simple paper strips instead of leaves.)
7. Place the leaves in the jar or place one or more at each guest’s place setting. Be sure to have pens handy too.
8. On Thanksgiving, the leaves can be filled out, placed in the jar and read during the day while the food cooks, at the dinner table or as a fun after-dinner activity!
More Ideas:
• Write each dinner guest’s name on one side of a paper leaf, lay it on his or her table setting and it doubles as a place card until they write on it and add it to the jar.
• Make each dinner guest or attending family their own small jar to take home as a party favor.
• The paper leaf shapes can also be created by using die-cuts, stencils, paper punches, rubber stamps or they can simply be drawn.
• Instead of just paper strips or leaf shapes, try making some shaped like pumpkins and turkeys too.
• Use scalloped or other patterned scissors to cut out the labels for the jars.
• Create the labels and lettering with fabric, craft foam or felt instead.
• Add each guest’s photo to their personal jar/place marker.
• Make a new jar for each year, and revisit the old ones from time to time to reminisce.
• Make the jars as fancy as desired by adding more embellishments like silk flowers or leaves, nature items, seeds, etc.
• For a “non-permanent” version of the project, use real leaves for the notes in the jar. Make a version of the jar for a great Mother’s or Father’s day gift; fill it with notes stating what is loved about the recipient.
-----------
Pamela Maxwell is an artist, author and mother of two quickly growing boys. Her craft and scrapbooking projects have appeared in numerous books and magazines. She is currently working on a kids’ craft book and a line of kids’ party supplies. Photo by Pamela Maxwell.


