Supplies:
Scraps of thin cardboard
Assorted colors of chenille stems (pipe cleaners)
Scraps of paper, craft foam or felt
Scraps of ribbon
Adhesive dots
Pencil
Scissors
Here's How:
1. Use a pencil to draw a simple holiday shape onto cardboard.
2. Cut the shape out with scissors. (A craft knife can be handy for some cuts, but it’s an adult’s job.)
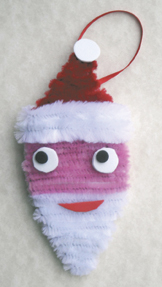
3. Start wrapping the shape with a chenille stem; begin at one end of the shape, bend it tight around the edges and hide the end of the stem on the back.
4. When one chenille stem ends, continue wrapping right next to it with another one.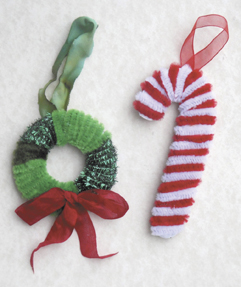
5. Tuck the ends of each chenille stem under on the back, or use adhesive dots to secure them. Adhesive dots can also be used to secure the stems at the very top and bottom edges of the shape.
6. Use scissors to cut details such as eyes, scarves and hats from paper, foam or felt. Adhere them to the ornaments with adhesive dots.
7. Use adhesive dots to attach ribbon accents and hangers and the ornaments are ready to hang on a tree, gift or any place that needs a little holiday cheer!
----------
Pamela Maxwell is an artist, author and mother of two quickly growing boys. Her craft and scrapbooking projects have appeared in numerous books and magazines. She is currently working on a kids’ craft book and a line of kids’ party supplies. Photos by Pamela Maxwell.
Published: December 2012

